
Merge 2 APFS Volumes
Solved
Skynets001
Posted messages
37
Status
Membre
-
Anonymous user -
Anonymous user -
Hello everyone,
I am aware that this question has been asked many times, but I can't find any reliable solutions for my case.
Here is the problem I am facing:
I just picked up my iMac from the technician who replaced my old Fusion Drive with an SSD. All my important files were transferred to an external hard drive, so no worries there. Once I retrieved the iMac, it was obviously empty, and I intended to perform the last update that I hadn't done: it's "Big Sur." I planned to reinstall the few software programs I had, but that shouldn't be a big issue.
Unfortunately, to install "Big Sur," my disk needed to be in APFS format, which wasn't the case. In "Disk Utility," I noticed that I was unable to format it as "APFS," as that option didn't appear in the list of available formats. I then decided to partition my disk into 2 equal parts, and there, Bingo! I could choose "APFS" as the format for the new partition. I named this new partition "Macintosh SSD APFS."
After completing the installation of "Big Sur," I tried to merge the 2 partitions together, but I couldn't find a reliable way to do it. Surprisingly, I was also able to format the first partition as "APFS," but it didn't yield any results. I even erased it (automatically becoming "Container disk 1") to see if I could do something.
By the way, I noticed that I am currently active on this part of the disk because I can click on the "-" button when I select the partition "Macintosh SSD APFS," but it remains grayed out when I select "Container disk 1."
In short, there’s no way to get my disk back into a single part! What should I do? ...
It should be noted that I have no software or important data currently on the iMac, so I definitely don't need to back anything up. No data loss is possible.
Also, I don't have extensive computer knowledge, and especially in this specific area of partitions/disks/memory, I'm clueless; I don't even know how to switch from one partition to another, so it's highly likely that what I did as described above seems absurd to you. In that case, it would be good to tell me if I was wrong. But especially to explain why. I hope you have all the elements to help me.
Thank you so much in advance for any answers you can provide!
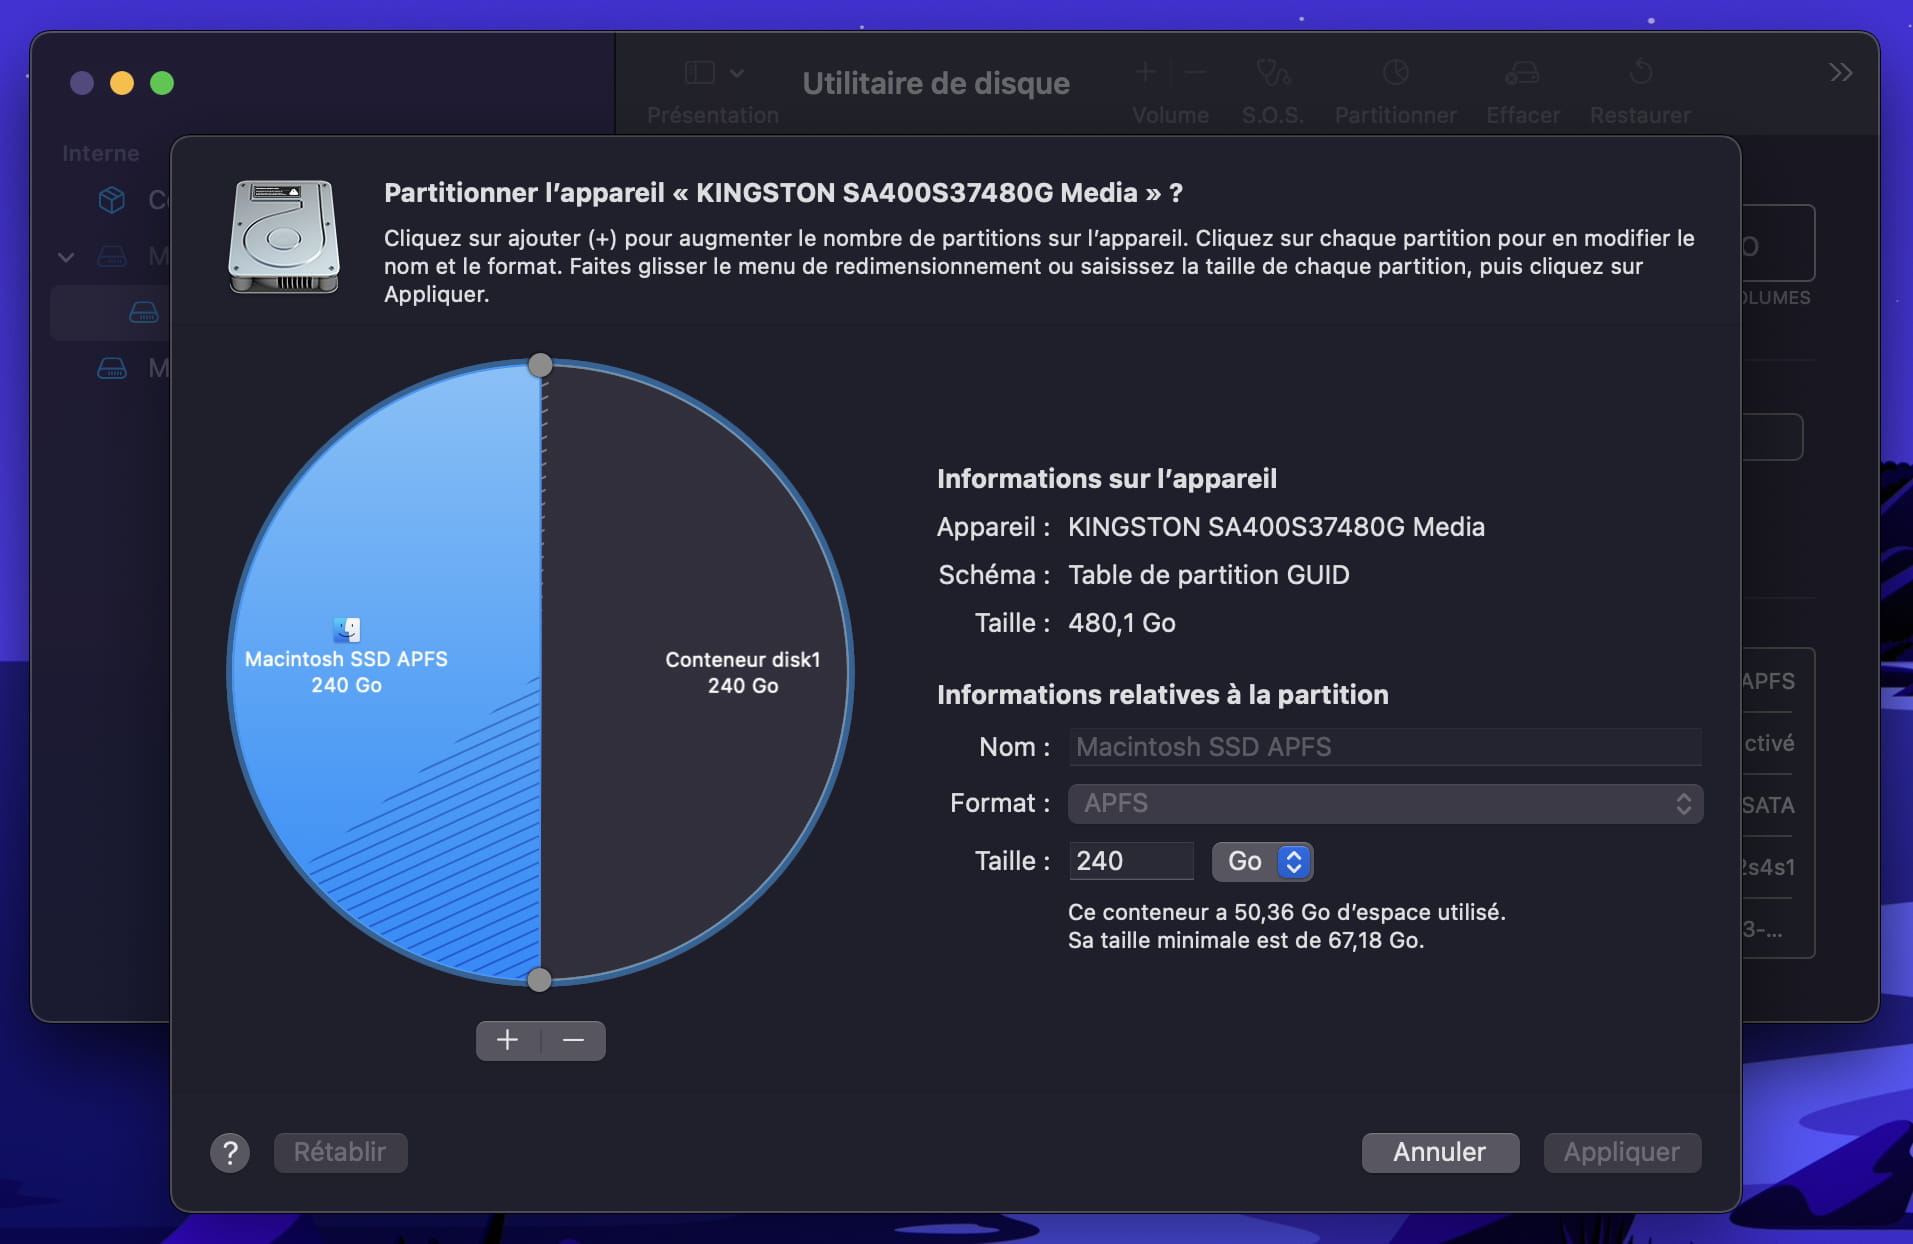
If the screenshot below can help you understand a bit more:

I am aware that this question has been asked many times, but I can't find any reliable solutions for my case.
Here is the problem I am facing:
I just picked up my iMac from the technician who replaced my old Fusion Drive with an SSD. All my important files were transferred to an external hard drive, so no worries there. Once I retrieved the iMac, it was obviously empty, and I intended to perform the last update that I hadn't done: it's "Big Sur." I planned to reinstall the few software programs I had, but that shouldn't be a big issue.
Unfortunately, to install "Big Sur," my disk needed to be in APFS format, which wasn't the case. In "Disk Utility," I noticed that I was unable to format it as "APFS," as that option didn't appear in the list of available formats. I then decided to partition my disk into 2 equal parts, and there, Bingo! I could choose "APFS" as the format for the new partition. I named this new partition "Macintosh SSD APFS."
After completing the installation of "Big Sur," I tried to merge the 2 partitions together, but I couldn't find a reliable way to do it. Surprisingly, I was also able to format the first partition as "APFS," but it didn't yield any results. I even erased it (automatically becoming "Container disk 1") to see if I could do something.
By the way, I noticed that I am currently active on this part of the disk because I can click on the "-" button when I select the partition "Macintosh SSD APFS," but it remains grayed out when I select "Container disk 1."
In short, there’s no way to get my disk back into a single part! What should I do? ...
It should be noted that I have no software or important data currently on the iMac, so I definitely don't need to back anything up. No data loss is possible.
Also, I don't have extensive computer knowledge, and especially in this specific area of partitions/disks/memory, I'm clueless; I don't even know how to switch from one partition to another, so it's highly likely that what I did as described above seems absurd to you. In that case, it would be good to tell me if I was wrong. But especially to explain why. I hope you have all the elements to help me.
Thank you so much in advance for any answers you can provide!
If the screenshot below can help you understand a bit more:
38 réponses
- 1
- 2
Suivant
Hello,
There is no other partition than the blue one. The blue one is in use, do not try to click on the "-" sign. The gray area is not a partition; it is free space to either add one or more partitions, or simply extend the existing blue partition to occupy the entire available space of the drive. Please reread my previous message. :)
Best regards.
I would rather do it on the partition shown in gray...
There is no other partition than the blue one. The blue one is in use, do not try to click on the "-" sign. The gray area is not a partition; it is free space to either add one or more partitions, or simply extend the existing blue partition to occupy the entire available space of the drive. Please reread my previous message. :)
Best regards.
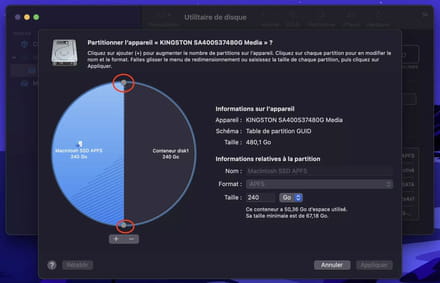
The point to grab to rotate it around the circle is one of the 2 points marked here in red:
As for manually modifying the value, you first need to select the blue partition...
https://support.apple.com/fr-fr/guide/disk-utility/dskutl1029/mac

As for manually modifying the value, you first need to select the blue partition...
https://support.apple.com/fr-fr/guide/disk-utility/dskutl1029/mac
Hello,
your image shows the container that holds your existing partition. The existing partition does not take up all the available space inside the container.
To make use of all the available space on your SSD, you simply need to increase the size of the existing partition shown in blue. This can be done in two possible ways: either by "dragging" the point on the edge to rotate it around the circle, or by entering a new value in the "Size" box… for example 480 instead of 240…
your image shows the container that holds your existing partition. The existing partition does not take up all the available space inside the container.
To make use of all the available space on your SSD, you simply need to increase the size of the existing partition shown in blue. This can be done in two possible ways: either by "dragging" the point on the edge to rotate it around the circle, or by entering a new value in the "Size" box… for example 480 instead of 240…
There, you added a new "untitled" partition, but you did not increase the size of the existing partition. Try turning the handles the other way.
What does this view look like on your end?

What does this view look like on your end?

Yes, but here I wonder if it's really the container that is selected, and not rather its included partition. You need to try deleting it from the left sidebar of Disk Utility.
EDIT :
If the problem persists, it may be due to the order of the containers. In this case, you should clone the active partition to a partition of the container on disk1, then boot from disk1, and finally delete disk2.
If the problem persists, it may be due to the order of the containers. In this case, you should clone the active partition to a partition of the container on disk1, then boot from disk1, and finally delete disk2.
I thought about this order problem, given that it is possible that the first level in the order of "disks" must necessarily be disks1 and therefore it may not be possible to delete it. However, if disks1 indeed contains a bootable partition (a volume) with a valid OS installed, and the Mac has successfully booted from this partition, then it should be possible to delete disks2. Once disks2 is deleted, the SSD will have free space, and thus it should allow expanding the active partition.
To clone a partition to another, the simplest way is to use the free version of SuperDuper: (the paid version is only useful for updating the clones, without needing to reclone everything from scratch)
https://www.shirt-pocket.com/SuperDuper/SuperDuperDescription.html
EDIT: If I get the chance, I will do some tests on the subject myself.
To clone a partition to another, the simplest way is to use the free version of SuperDuper: (the paid version is only useful for updating the clones, without needing to reclone everything from scratch)
https://www.shirt-pocket.com/SuperDuper/SuperDuperDescription.html
EDIT: If I get the chance, I will do some tests on the subject myself.
It would be interesting to see what the Terminal returns after typing this command in its window:
diskutil list
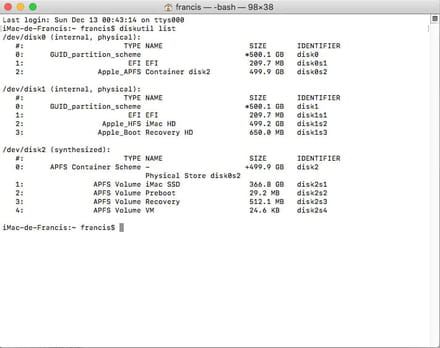
If I type this command on my iMac, where I added an SSD next to my internal hard drive, I get this window:
And if I type the command on my MacBook Air, I get this:
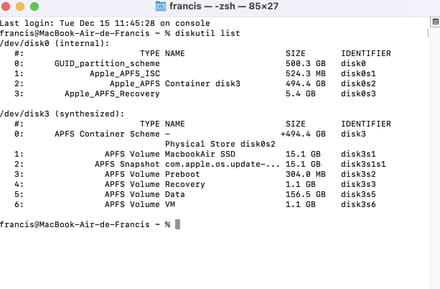
We can then better understand the hierarchy of containers and volumes...
diskutil list
If I type this command on my iMac, where I added an SSD next to my internal hard drive, I get this window:

And if I type the command on my MacBook Air, I get this:

We can then better understand the hierarchy of containers and volumes...
OK - here I see that disk1 is empty. However, disk2 contains the recovery partition. Therefore, we need to keep disk2 as it is. So let's forget about cloning disk2 to disk1.
Try then to boot from this recovery partition, which is done by holding down both the cmd and R keys throughout the startup phase.
When the Mac starts from its recovery partition, a window offers macOS utilities.
Then choose Disk Utility.
In Disk Utility, you should be able to select the disk1 container in the left column. Select it and right-click to request its deletion or erase it from the toolbar...
If you do not see this container, from the View menu, select "Show all devices"
For the next steps, exit Disk Utility, then exit the macOS Utilities, and request a restart...
Try then to boot from this recovery partition, which is done by holding down both the cmd and R keys throughout the startup phase.
When the Mac starts from its recovery partition, a window offers macOS utilities.
Then choose Disk Utility.
In Disk Utility, you should be able to select the disk1 container in the left column. Select it and right-click to request its deletion or erase it from the toolbar...
If you do not see this container, from the View menu, select "Show all devices"
For the next steps, exit Disk Utility, then exit the macOS Utilities, and request a restart...
Note that if the Mac has started from its recovery partition, it is possible, from Disk Utility, to completely erase the SSD (only the recovery partition will remain), and afterwards to request the reinstallation of Big Sur from macOS Utilities. This should help resolve the issue, since there is nothing to recover anyway.
In this case, it is better to connect the Mac via cable to the router rather than using WIFI.
In this case, it is better to connect the Mac via cable to the router rather than using WIFI.


Yes, as mentioned above, I stated that I clicked on "Partition" (and not "Erase"). I was perhaps thinking that the "-" ("-Delete") button would be enabled. But in the end, no...
So I am going to "Erase" now, I'll keep you updated on the change but I don't think there will be anything special since I had already done it before (before coming to this forum). Besides, I can do it without restarting with the CMD+R command, but I will do it this way anyway.
So I am going to "Erase" now, I'll keep you updated on the change but I don't think there will be anything special since I had already done it before (before coming to this forum). Besides, I can do it without restarting with the CMD+R command, but I will do it this way anyway.
what does it give, the same erasure operation, but after selecting the physical part of the SSD, and not one of its volumes, meaning after selecting the Kingston line...?


Always GUID for Mac. Give this drive a definitive name (rather than Untitled 2) to avoid having to do it later.
Yes, that's it... make sure you have a good internet speed and a wired connection to the box rather than using WIFI.
Hello to you and thank you (again) for your help!!
Actually, I can do neither of the two methods. I can click on the "-" button of the score shown in blue. I would have preferred to do it on the score shown in gray...
Actually, I can do neither of the two methods. I can click on the "-" button of the score shown in blue. I would have preferred to do it on the score shown in gray...
Alright! I understand what you mean. I can choose to add a volume or enlarge the partition displayed in blue.
The first method, which involves clicking and dragging from the "anchor point" located at the extremes of my partition's boundary, doesn't work. Simply put, it is not present; no point appears, despite hovering my cursor or clicking randomly.
As for the second method, which simply involves manually modifying the memory in the field on the left, no matter what amount I enter, once I try to confirm it, it doesn’t get accepted. It automatically reverts to "240 GB." Whether I try "480," "420," or even "300"…
Did I miss something in your message? Let me know; I’m getting lost LOL.
Anyway, thank you very much for your answers!!
The first method, which involves clicking and dragging from the "anchor point" located at the extremes of my partition's boundary, doesn't work. Simply put, it is not present; no point appears, despite hovering my cursor or clicking randomly.
As for the second method, which simply involves manually modifying the memory in the field on the left, no matter what amount I enter, once I try to confirm it, it doesn’t get accepted. It automatically reverts to "240 GB." Whether I try "480," "420," or even "300"…
Did I miss something in your message? Let me know; I’m getting lost LOL.
Anyway, thank you very much for your answers!!
Actually, I just understood why there are these anchor points on the screenshot. They only appear if I hold down the "command" key. But even doing that, I cannot enlarge it; it creates a 3rd part named "Untitled" and the 2nd part that I would like to make disappear remains present.
Here's what happens when I drag the partition to the left:
1/ When I drag it:
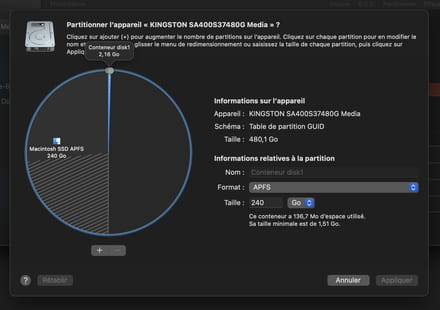
2/ When I release the click:

Here's what happens when I drag the partition to the left:
1/ When I drag it:
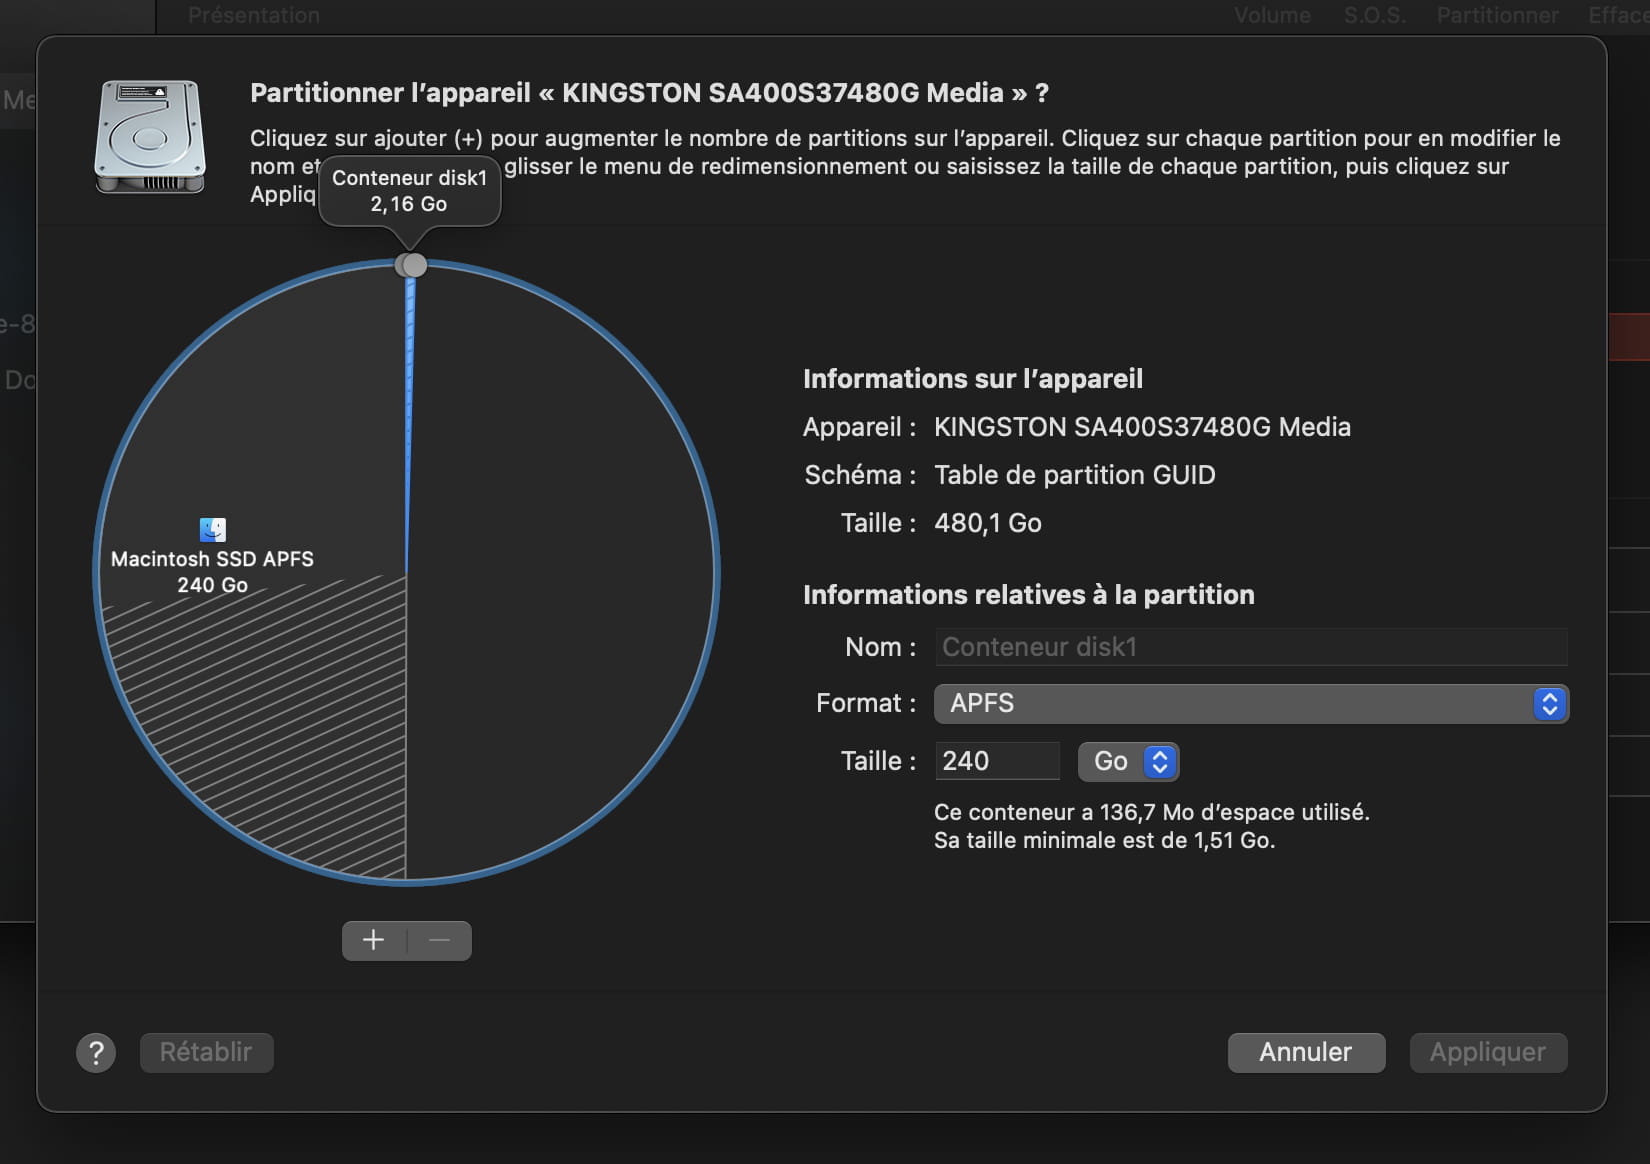
2/ When I release the click:

- 1
- 2
Suivant